{article.name}
Stay Informed
From Egg to Chick: A Home Hatchery Guide and 30-Day Journey

- Share this:
- Share on Facebook
- Pin on Pinterest
- Tweet on Twitter
Embarking on the journey of hatching eggs at home can be a rewarding experience, offering a front-row seat to the miracle of life. Whether you're a seasoned poultry enthusiast or a first-time hatchery, this blog will guide you through the process of hatching eggs at home and provide a comprehensive 30-day plan for nurturing baby chicks as they embark on their life's journey.
Hatching Eggs at Home
1. Choosing Fertile Eggs:
Start your hatchery journey by selecting fertile eggs from healthy, disease-free hens and roosters. Ensure that the eggs are fresh, clean, and free from cracks.
2. Setting Up an Incubator:
Invest in a reliable incubator with temperature and humidity control. Place the incubator in a stable location away from drafts and direct sunlight. Follow the manufacturer's guidelines for optimal settings.
3. Egg Placement and Turning:
Position the eggs in the incubator with the pointed end down. Eggs should be turned regularly, preferably every 4-6 hours, for the first 18 days to prevent the embryo from sticking to the shell.
4. Monitoring Temperature and Humidity:
Maintain a consistent temperature of around 99.5°F (37.5°C) and humidity between 40-50% during the incubation period. Make necessary adjustments based on the incubator's readings.
5. Candling Eggs:
After 7 days, use a candling device to inspect the eggs. Remove any clear or non-developing eggs to prevent contamination.
6. Lockdown Period:
During the final three days of incubation, cease turning the eggs and increase humidity to around 60-70%. This simulates the natural conditions a chick would experience in the final days before hatching.
7. Hatching Day:
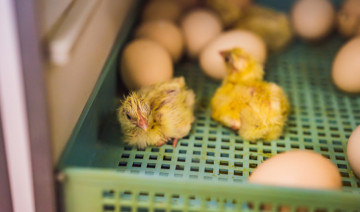
Prepare for the excitement of hatching day! Keep a close eye on the eggs, and once a chick starts to emerge, resist the urge to intervene. Allow nature to take its course.
A 30-Day Guide for Baby Chicks
Days 1-7: Brooder Setup:
Transfer the hatched chicks to a clean and warm brooder. Maintain a temperature of around 95°F (35°C) for the first week.
Days 8-14: Temperature Adjustment:
Gradually reduce the temperature in the brooder by 5°F (2.8°C) each week until it reaches the ambient temperature.
Days 15-21: Introduction to Solid Feed:
Introduce a high-quality chick starter feed. Provide fresh water and encourage the chicks to start pecking at the feed.
Days 22-28: Feather Growth and Socialization:
Chicks should start developing feathers. Offer larger spaces for exploration, and provide opportunities for socialization with other chicks.
Days 29-30: Transition to Coop:
Begin preparing a safe and suitable coop for the chicks. Transition them to the coop with a heat source if needed.
Hatching eggs at home and nurturing baby chicks through their first 30 days is a delightful and educational experience. It requires attention to detail, dedication, and a commitment to creating a healthy and nurturing environment. By following these guidelines, you'll not only witness the incredible process of life but also contribute to the growth of a thriving flock. Remember, each day is a new adventure for your chicks, and your role as their caretaker is crucial in ensuring a happy and healthy start to their lives.
Special Offers
We are constantly adding new specials to our site. Be sure to check back often!

Comments